Build an Android app that connects to a MQTT device

What is MQTT?
MQTT is an open network protocol that many smart home devices use to send and receive small packages in your network. Normally you have a server (a "Broker") and clients (like power plugs, temperature sensors any many more) that connect to the broker. There is no direkt connection between the devices but you subscribe to "topics" and the clients send messages to those topics. For example you can subscribe to a topic called stat/device_name/RESULT and when that device sends out a message to that topic you will receive it.
On the other hand when you want to make a device do something you'll send out a message with a payload to a topic and the device will get that message. Sending cmnd/device_name/Power with the payload TOGGLE will switch the power on/off.
Create the app
We start with a simple new Alloy app:
ti create --alloyName the app "mqtt_test", bundle id "com.test.mqtt" and we a ready to go: open the new project in your editor.
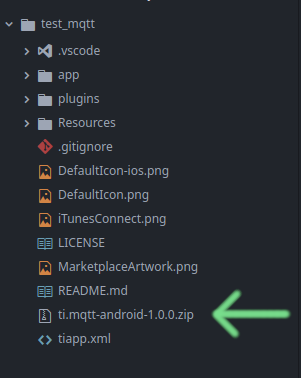
Now go to https://github.com/m1ga/ti.mqtt and download the ZIP file from the release tab and place it in your project root folder.
In your tiapp.xml file add a new module:
<modules>
	<module>ti.mqtt</module>
</modules>
Go ahead an build the app now:
ti build -p androidIt will extract the module and run the default Titanium Alloy app. It's time to add some code.
Network setup
In this tutorial we will work with the following network setup:
- Broker: 192.168.0.2
- Power plug: name "power_tv" (Teckin device)
The app
The app will just have two buttons and a label that displays the current state of the power switch.
Fist we add the UI into the view: index.xml
<Alloy>
	<Window>
		<Button id="btn_connect" title="connect" onClick="onClickConnect"/>
		<Button id="btn_toggle" title="toggle" onClick="onClickToggle"/>
		<Label id="lbl_status" text="-"/>
	</Window>
</Alloy>
This would add all items in the center on top of each other. To change that we add some simple styling into the index.tss file:
"Window" : {
	layout: "vertical"
}
"Label" : {
	width: Ti.UI.SIZE,
	height: Ti.UI.SIZE
}
And this into your index.js
function onClickConnect(e) {}

function onClickToggle(e) {}

$.index.open();
Build the app again and it will look like this:

Now it's time to add the MQTT module code. We import it and add the default events
const mqtt = require("ti.mqtt");

mqtt.addEventListener("error", function(e) {
	console.log(e);
});

mqtt.addEventListener("connected", function(e) {
	console.log("connected");
});

mqtt.addEventListener("subscribed", function(e) {
	console.log("subscribed");
});

mqtt.addEventListener("message", function(e) {
	console.log("Payload:" + e.payload);
	console.log("Topic:" + e.topic);
});
We will use the "connect"-button click event to connect to the broker:
function onClickConnect(e) {
	mqtt.createClient({
		server: "192.168.0.2",
		port: 1883
	})
	mqtt.connect();
}
If everything is setup correctly you will see "connected" in your output log after clicking on the "connect" button.
The power plug will send out info to the stat/power_tv/RESULT topic. Inside the connected event we add a subscribe method:
mqtt.subscribe({
	topic: "stat/power_tv/RESULT"
})
Your log will show connected and subscribed after that.
If you keep running your app for a while you might also see some output already, depending on your device. We can force that by publishing a message to the topic cmnd/power_tv/Power. Below subscribe add this method:
mqtt.publish({
	topic: "cmnd/power_tv/Power",
	payload: ""
})
The full connected event looks like this now
mqtt.addEventListener("connected", function(e) {
	console.log("connected");

	mqtt.subscribe({
		topic: "stat/power_tv/RESULT"
	})

	mqtt.publish({
		topic: "cmnd/power_tv/Power",
		payload: ""
	})
});
Now when you press the connect button the output will be
[INFO]  connected
[INFO]  subscribed
[INFO]  Topic:stat/power_tv/RESULT
[INFO]  Payload:{"POWER":"OFF"}
As you can see the payload will trigger the message event and show the payload. We parse the payload string to a JSON and set the POWER value to the label. Put this into the message event:
var data = JSON.parse(e.payload);
if (data.POWER) {
	$.lbl_status.text = data.POWER;
}
Connecting to the device will show ON or OFF in your label now.
In the last step we want to toggle the power state. The topic is cmnd/power_tv/Power again but this time we add a payload TOOGLE. Put this code in the onClickToggle method:
function onClickToggle(e) {
	mqtt.publish({
		topic: "cmnd/power_tv/Power",
		payload: "TOGGLE"
	})
}
Save the app, build it and click "connect" and "toggle". Your plug will switch its state and the label will update after that, too.