Take pictures and use the Android/iOS camera
Another must have feature in an app is to access the camera and take pictures or videos. In this short tutorial we will create a small app that adds a 'take a picture' button.
Project setup
We will start with an empty Alloy project.
ti create
# go into the folder
alloy new
Have a look at the last section of the first tutorial.
Permissions
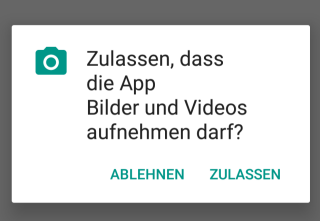
For security reasons both Android and iOS needs to ask the user first to access the camera. For iOS you need to add a key to the tiapp.xml:
<ios>
    <plist>
        <dict>
            <key>NSCameraUsageDescription</key>
            <string>To take a picture we want to use the camera</string>

            <!-- needed for video -->
            <key>NSCameraUsageDescription</key>
            <string>For Video recording we want to use the microphone</string>
        </dict>
    </plist>
</ios>
and for Android this needs to be added to the manifest:
<android xmlns:android="http://schemas.android.com/apk/res/android">
    <manifest>
        <uses-permission android:name="android.permission.CAMERA"/>

        <uses-permission android:name="android.permission.READ_EXTERNAL_STORAGE"/>
        <uses-permission android:name="android.permission.WRITE_EXTERNAL_STORAGE"/>
    </manifest>
</android>
Then inside the app itself we need to ask for permission again which the users has to accept or decline.

Titanium has build-in functions to request these permissions. Since it might be handy to use this in other apps to we create an external library and include the code there so we can use this file in other apps to. To do this you have to create a lib folder at /app/lib/ and inside this folder we create a new file called helper.js.
There we add our getPermissions() script:
exports.getPermissions = function(opt) {
    //
}
The code for Android and iOS is a bit different so we check for the platform and ask for the specific platform permission.
exports.getPermissions = function(opt) {
        Ti.Media.requestCameraPermissions(function(e) {
            if (e.success) {
                // run callback
                opt();
            } else {
                // ask again
                exports.getPermissions(opt);
            }
        });
}
Say cheese
Now that we can ask for the permission it is time to open the camera! We add a simple button to our view and add a click event to it so we can open the camera.
<Alloy>
    <Window>
        <Button id="btn_record" title="Take a picture" />
    </Window>
</Alloy>
function onClickRecord(e) {}
$.btn_record.addEventListener("click",onClickRecord);
$.index.open();All we need to do now is call our getPermissions() helper script and once we have the correct permission we can open the camera. To use the lib/helper.js we need to require() it:
var helper = require("/helper");Then we can use all export functions in our code:
helper.getPermissions(function(){});The last part is opening the camera:
Ti.Media.showCamera({});So the whole code will look like this:
var helper = require("/helper");

function onClickRecord(e) {
    helper.getPermissions(function(){
        // permission granted

        // open the camera
        Ti.Media.showCamera({})
    });
}

$.btn_record.addEventListener("click",onClickRecord);
$.index.open();
If you click the button now it will ask you for camera and storage permission the first time and then open the camera.
The showCamera() method has some properties you can set to change some options and to get the image. For a full list check out: https://titaniumsdk.com/api/structs/cameraoptionstype.html
The most common option is the success callback. This will be called after the images was taken and you can get the actual image to show it in your app or store it.
Ti.Media.showCamera({
    success: function(e) {
        // display image information:
        console.log(e.media);
        // $.imageView.image = e.media;    // to put it into an imageview
    }
})
You can also add a custom overlay to the camera with overlay. When you set an overlay it won't run the normal camera as an intent but it will create a custom camera view for you. You have to take care of the actions/buttons (Ti.Media.takePicture(),Ti.Media.hideCamera(),…) yourself! overlay accepts a view as a parameter.