Use iCloud Drive with Titanium SDK

This tutorial is based on a How-to guide by Alessandro La Rocca posted on Slack with his steps how to include iCloud drive into your Titanium SDK iOS app.
Apple Setup
Login into developer.apple.com
Assuming you already have created the identifier for your app (App ID). For example:
- Description: Test
- Bundle ID: com.myapp.id
Select Identifiers.
Create a new identifier and choose iClod:

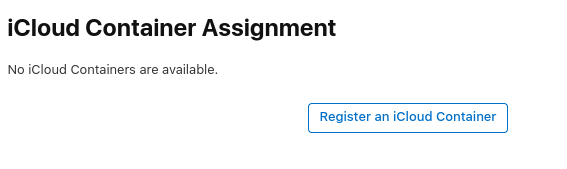
Enable it and click "Configure" and register a new iCloud continer
Set the description to e.g. your app name (eg, Test) and the identifier should be your app bundle id using the iCloud. prefix (eg, iCloud.com.myapp.id)

Now edit you App ID again, check iCloud and select the container you've created above.
After that you can go to profiles and regenerate the app profile, download and install it.
Titanium Setup
Now it is time to edit your Titanium SDK app and put in some code to access the iCloud. First edit your tiapp.xml file and add the entitlement and plist entries.
Inside the <plist> add the following:
<key>NSUbiquitousContainers</key>
<dict>
    <key>iCloud.com.myapp.id</key>
    <dict>
        <key>NSUbiquitousContainerIsDocumentScopePublic</key>
        <true/>
        <key>NSUbiquitousContainerName</key>
        <string>Test</string>
        <key>NSUbiquitousContainerSupportedFolderLevels</key>
        <string>Any</string>
    </dict>
</dict>
And create a new <entitlements> block under the closing </plist> and add:
<entitlements>
	<dict>
		<key>com.apple.developer.icloud-container-identifiers</key>
		<array>
			<string>iCloud.com.myapp.id</string>
		</array>
		<key>com.apple.developer.icloud-services</key>
		<array>
			<string>CloudDocuments</string>
		</array>
		<key>com.apple.developer.ubiquity-container-identifiers</key>
		<array>
			<string>iCloud.com.myapp.id</string>
		</array>
	</dict>
</entitlements>
Make sure to edit both entries and replace Test with your app name and iCloud.com.myapp.id with your selected iCloud Container identifier.
The final step is to include the hyperloop module into your projects <modules> section: <module platform="iphone">hyperloop</module>. After that you have all tiapp.xml items ready and you can add code into your app.
The following code will retrieve the iCloud Drive path. A folder with your app name will be automatically created when the first file will be stored.
Note: Does not work on simulator.
var NSFileManager = require('Foundation/NSFileManager');
var fileManager = NSFileManager.alloc().init();
var driveUrl = fileManager.URLForUbiquityContainerIdentifier(null);
if (driveUrl) {
  var docsFolder = Ti.Filesystem.getFile(driveUrl, 'Documents');
  var testFile = Ti.Filesystem.getFile(docsFolder.nativePath, 'test.txt');
  testFile.write('Titanium on iCloud Drive');
}