Building a photo overlay app

In this tutorial we will build a photo overlay app where you can take a picture, chose an overlay, save that picture and share it. We are going to build this app with Titanium SDK and it will run on Android and iOS at the end. The screenshots will use an Android phone but if there is anything special for iOS I'll add a note in the tutorial.
If you want to see other tutorials e.g. how to install Titanium SDK then make sure to look at fromzerotoapp.com/tutorials first. Let's get started!
Create a new project
We will start by creating a new Alloy app project:
ti create --alloy
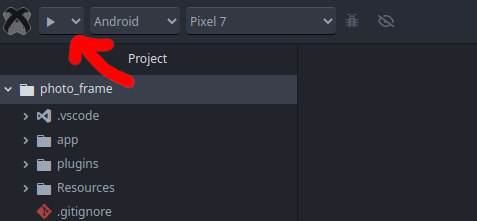
Now open that new project folder in your editor (Pulsar, VSCode or anything you like) and run a build
CLI
ti build -p androidVSCode

Pulsar
Permissions
For security reasons both Android and iOS needs to ask the user first to access the camera. For iOS you need to add a key to the tiapp.xml:
<ios>
    <plist>
        <dict>
            <key>NSCameraUsageDescription</key>
            <string>To take a picture we want to use the camera</string>

            <!-- needed for video -->
            <key>NSCameraUsageDescription</key>
            <string>For Video recording we want to use the microphone</string>
        </dict>
    </plist>
</ios>
and for Android this needs to be added to the manifest:
<android xmlns:android="http://schemas.android.com/apk/res/android">
    <manifest>
        <uses-permission android:name="android.permission.CAMERA"/>

        <uses-permission android:name="android.permission.READ_EXTERNAL_STORAGE"/>
        <uses-permission android:name="android.permission.WRITE_EXTERNAL_STORAGE"/>
    </manifest>
</android>
Code
Now it's time to clean up the demo project and add a first button to start the camera.
All UI elements go in the app/views/index.xml. So we add the button there:
<Alloy>
	<Window>
		<Button id="btn_picture">Take picture</Button>
	</Window>
</Alloy>
Clear the app/styles/index.tss file and add this block to the app/styles/app.tss so it will apply to all our windows:
"Window": {
  backgroundColor: "windowBackground"
}
In order to make use of the color string windowBackground we add this to app/assets/semantic.colors.json
{
  "windowBackground": {
    "light": "#ffffff",
    "dark": "#000000"
  },
  "textColor": {
    "light": "#000000",
    "dark": "#ffffff"
  }
}
This file is used for dark/light mode changes of your phone. If it is in dark mode it will use the dark color, otherwise the light color when you use the color string.
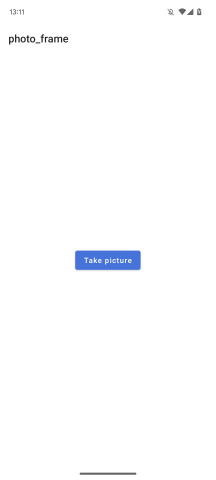
When we build the app it will show a simple button.

The next task is to ask the user for permissions to access the camera. We use a small helper script that asks for the correct permissions on Android and iOS. Titanium SDK has a build-in method to ask for permission. Add a click event to the button and add the permission request:
<Alloy>
	<Window>
		<Button id="btn_picture" onClick="onClickPicture">Take picture</Button>
	</Window>
</Alloy>
and
function onClickPicture(e) {
	Ti.Media.requestCameraPermissions(function(e) {
		if (e.success) {
			console.log("got permission");
		} else {
			console.log("no permission");
		}
	});
}

$.index.open();
When you build the app and click the button you will see the request dialog:
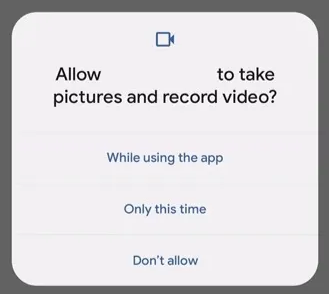
To show the camera we can use the e.success branch and call a method to open the phone camera. Add this line below the "got permission" line: Ti.Media.showCamera({}); The full controller looks like this now and it will show the camera when you click the button:
function onClickPicture(e) {
	Ti.Media.requestCameraPermissions(function(e) {
		if (e.success) {
			console.log("got permission");
			Ti.Media.showCamera({});
		} else {
			console.log("no permission");
		}
	});
}

$.index.open();
Camera -> Titanium
At the moment the image is only visible when you have the camera view open but we want to have it in our app. showCamera has a success callback after you took an image. This contains the actual image (image, size, width, height). To show it inside the app we need to add an ImageView too. So extend the view with an ImageView and adjust the styles
<Alloy>
	<Window>
		<ImageView id="img_photo"/>
		<Button id="btn_picture" onClick="onClickPicture">Take picture</Button>
	</Window>
</Alloy>
'#img_photo': {
  top: 0,
  height: 400,
  scalingMode: Ti.Media.IMAGE_SCALING_ASPECT_FIT
}

"#btn_picture": {
  bottom: 10
}
Change the showCamera method to
Ti.Media.showCamera({
	success: onCameraSuccess
});
and add the onCameraSuccess function to assign the camera image to the ImageView:
function onCameraSuccess(e){
	$.img.image = e.media;
}
This is the full controller:
function onClickPicture(e) {
Ti.Media.requestCameraPermissions(function(e) {
if (e.success) {
Ti.Media.showCamera({
success: onCameraSuccess
});
} else {
console.log("no permission");
}
});
}
function onCameraSuccess(e){
$.img_photo.image = e.media;
}
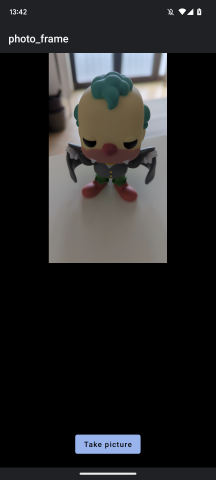
$.index.open();Build the app and take a picture:
Make some overlays
Now that we can take a picture and display it in the app it is time to add some overlays. Here are two images you can use. Place them in app/assets/images


The UI element we are going to use now is called ScrollableView. That will allow the user to swipe through different pages (like a view or image). So add this with two ImageView elements in the controller:
<Alloy>
	<Window>
		<ImageView id="img_photo"/>

		<ScrollableView id="scroller">
			<ImageView id="img1" image="/images/overlay_hat.png"/>
			<ImageView id="img2" image="/images/overlay_smile.png"/>
		</ScrollableView>

		<Button id="btn_picture" onClick="onClickPicture">Take picture</Button>
	</Window>
</Alloy>
The style file
'#img_photo': {
  top: 0,
  height: 400,
  scalingMode: Ti.Media.IMAGE_SCALING_ASPECT_FIT
}

"#btn_picture": {
  bottom: 10
}

'#scroller': {
  top:0,
  height: 400
}
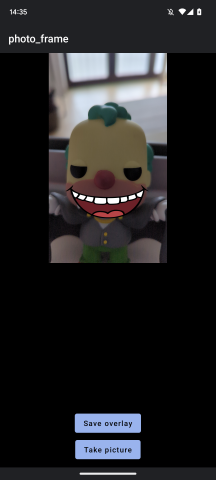
To hide the whole scroller at app start just add visible: false to the #scroller tss block and add $.scroller.visible = true; into onCameraSuccess to show it after the image was taken.
Save the image
The user can take an image and chose an overlay now. In the next step we will combine both layers and save it into one file. There is a method toImage() in Titanium SDK that does this. To get both elements into one file we simply wrap another View around the slider and the image and add a second button:
<Alloy>
	<Window>
		<View id="view_all">
			<ImageView id="img_photo"/>

			<ScrollableView id="scroller">
				<ImageView id="img1" image="/images/overlay_hat.png"/>
				<ImageView id="img2" image="/images/overlay_smile.png"/>
			</ScrollableView>
		</View>

		<Button id="btn_save" onClick="onClickSave">Save overlay</Button>
		<Button id="btn_picture" onClick="onClickPicture">Take picture</Button>
	</Window>
</Alloy>
The corresponding TSS file looks like this:
'#img_photo': {
  top: 0,
  height: 400,
  scalingMode: Ti.Media.IMAGE_SCALING_ASPECT_FIT
}

"#btn_picture": {
  bottom: 10
}

'#scroller': {
  top:0,
  height: 400,
  visible: false
}

'#btn_save': {
  bottom: 60
}

'#view_all': {
  top:0,
  height: 400,
}
and we have a new event method in our controller:
function onClickPicture(e) {
	Ti.Media.requestCameraPermissions(function(e) {
		if (e.success) {
			Ti.Media.showCamera({
				success: onCameraSuccess
			});
		} else {
			console.log("no permission");
		}
	});
}

function onCameraSuccess(e) {
	$.img_photo.image = e.media;
	$.scroller.visible = true;
}

$.index.open();

function onClickSave(e) {} // new
Inside onClickSave we will use the toImage() method and save the combined blob in a image file. Titanium SDK has a whole list of Ti.Filesystem functions that we can use for that. We create a new file in the application folder and write the data into that file. The code for that is:
function onClickSave(e) {
	// combine all child items in $.view_all
	$.view_all.toImage(function(blob) {
		// create a new file
		let file = Ti.Filesystem.getFile(Ti.Filesystem.applicationDataDirectory, "image.jpg");
		// write the blob into that file
		file.write(blob);
	})
}
Share the image
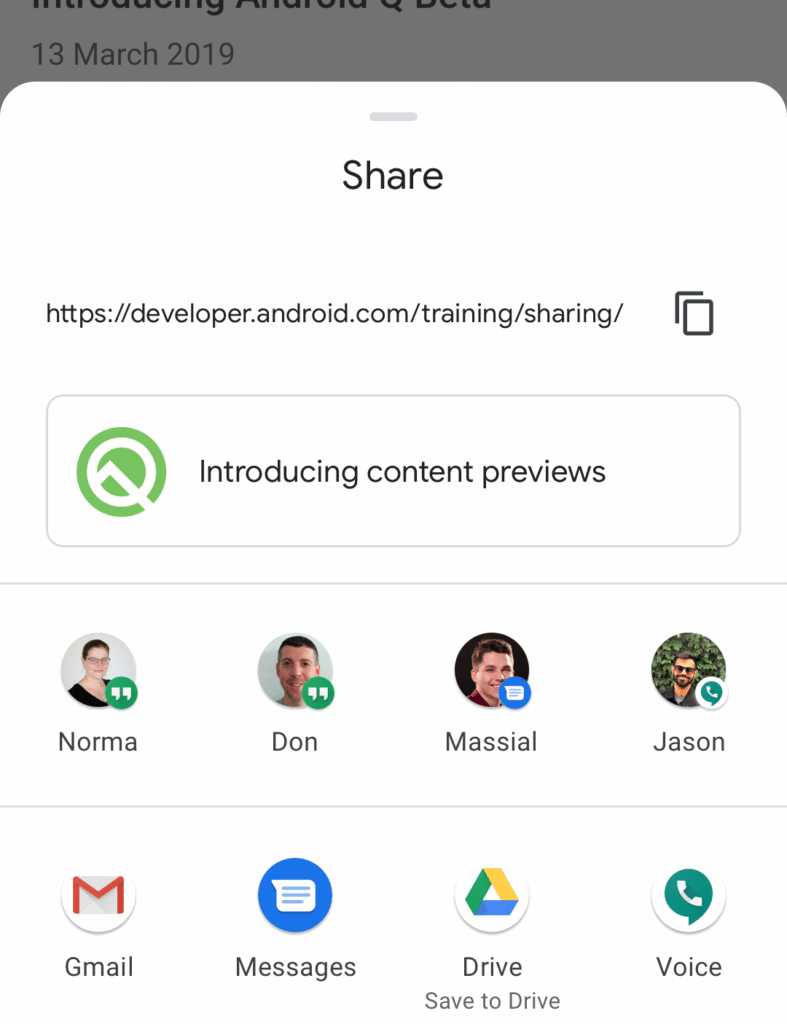
Android
At first we will look at the Android sharing process. To send files from one app to another we can use Intents. Inside our app we start an intent with the image and the system will show you all apps that can handle images like Instagram, Mail or other installed apps. It is the default share dialog you probably have seen in other apps too:
Since this is only Android code we can use an if (OS_ANDROID) check and add platform specific code. To call the share intent we use this
function onClickSave(e) {
	// combine all child items in $.view_all
	$.view_all.toImage(function(blob) {
		// create a new file
		let file = Ti.Filesystem.getFile(Ti.Filesystem.applicationDataDirectory, "image.jpg");
		// write the blob into that file
		file.write(blob);

		if (OS_ANDROID) {
			// use Androids share dialog to send the image
			// to another app like Mail, Instagram, ...
			let intent = Ti.Android.createIntent({
				action: Ti.Android.ACTION_SEND,
				type: "image/*"
			});
			intent.putExtraUri(Ti.Android.EXTRA_STREAM, file.nativePath);
			Ti.Android.currentActivity.startActivity(intent);
		}
	})
} 
iOS
For iOS we have to use an external module to achieve the same effect.The plugin is called appcelerator-socialshare and is available at https://github.com/tidev/appcelerator.social-share/releases. Download the version 1.0.0 ZIP file and place it in your project folder. After that go into your tiapp.xml file and fine the <modules></modules> section and add the module:
<modules>
	<module>appcelerator.socialshare</module>
</modules>
When you compile your app it will extract the ZIP file automatically and you can use the module in your app now.
The syntax of the module is described in their readme file. The share image code will be this one:
// iOS - use an external module to share
let socialshare = require("appcelerator.socialshare");
let itemProviderImage = socialshare.createActivityItemProvider({
	contentType: socialshare.Content_Type_Image,
	placeHolder: 'placeholder'
});
itemProviderImage.fetchItem = function() {
	return blob;
};

setTimeout(function() {
	// little timeout before opening the dialog
	socialshare.shareWithItems({
		activityItems: [itemProviderImage],
	});
}, 250)
Adding that into an else branch of the onClickSave Android section. That makes the final controller look like this:
function onClickPicture(e) {
	Ti.Media.requestCameraPermissions(function(e) {
		if (e.success) {
			Ti.Media.showCamera({
				success: onCameraSuccess
			});
		} else {
			console.log("no permission");
		}
	});
}

function onCameraSuccess(e) {
	$.img_photo.image = e.media;
	$.scroller.visible = true;
}

function onClickSave(e) {
	// combine all child items in $.view_all
	$.view_all.toImage(function(blob) {
		// create a new file
		let file = Ti.Filesystem.getFile(Ti.Filesystem.applicationDataDirectory, "image.jpg");
		// write the blob into that file
		file.write(blob);

		if (OS_ANDROID) {
			// use Androids share dialog to send the image
			// to another app like Mail, Instagram, ...
			let intent = Ti.Android.createIntent({
				action: Ti.Android.ACTION_SEND,
				type: "image/*"
			});
			intent.putExtraUri(Ti.Android.EXTRA_STREAM, file.nativePath);
			Ti.Android.currentActivity.startActivity(intent);
		} else {
			// iOS - use an external module to share
			let socialshare = require("appcelerator.socialshare");
			let itemProviderImage = socialshare.createActivityItemProvider({
				contentType: socialshare.Content_Type_Image,
				placeHolder: 'placeholder'
			});
			itemProviderImage.fetchItem = function() {
				return blob;
			};

			setTimeout(function() {
				// little timeout before opening the dialog
				socialshare.shareWithItems({
					activityItems: [itemProviderImage],
				});
			}, 250)
		}
	})
}

$.index.open();
Optimizations
The app is working but we can make some optimizations. One very useful feature will be an overlay in the camera view so it is easier to have the head in the correct position. This will be added in a later tutorial.