Extending Titanium SDK
Ever wanted to have a new property or feature in Titanium SDK or you've found a bug and want to fix it? In this tutorial we will have a look on how to extend the SDK, how to build it, test in and how to get your pull request merged into the main repository.
Get the SDK
Titanium SDK is an open source framework hosted on Github. The first step to get started is getting the source code. Head to https://github.com/tidev/titanium-sdk and clone the repository to a local folder:
git clone https://github.com/tidev/titanium-sdk
cd titanium-sdk/
Build the SDK
Before we do some changes we will build the SDK to know that everything is running fine and the tool-chain is setup correctly.The build system is using node to run the tools. We install the packages and do a clean build of the SDK:
npm i
npm run cleanbuild
That's it! You have your own SDK now. You can see the version number at the end that you can use in your apps to use that custom SDK:
BUILD SUCCESSFUL in 1s
3 actionable tasks: 3 executed
Zipping up packaged SDK to titanium-sdk/dist/mobilesdk-12.3.0-linux.zip
Packaging version (12.3.0) complete
Destination exists, deleting /.titanium/mobilesdk/linux/12.3.0…
In this case it will be <sdk-version>12.3.0</sdk-version> in your tiapp.xml.
Build options
If you take a look at the package.json file you can see that there are other npm scripts you can run. If you just want to build for Android you could run npm run cleanbuild:android or if you just want to build locally without cleaning first and don't need a ZIP file (will be faster) you can use npm run build:local. Other npm scripts will be used later one in the process. But now it is time to edit some code.
Project structure
The following main folders are inside the titanium-sdk project:
| android/ | all Android related code. You can open this with Android Studio |
| apidoc/ | SDK documentation |
| cli/ | node scripts that are triggered by the CLI |
| dist/ | output folder |
| iphone/ | all iOS related code |
| test/ | mocha tests |
There are other folders you can have a look at but for this tutorial the android/ and iphone/ folder are the main folders we work in.
Android
You can utilize Android Studio with it's code completion features to extend the Android part of the SDK. Open the android/ folder in Android Studio and you can see a titanium project in the Project tab with a Java folder containing all source files.
There is a also a small JS test app in android/app/src/main/assets/Resources/app.js where you can add normal Titanium code and build it using the Android Studio play/debug button in the top right corner:

This will build the SDK and start the app.js file on your device/emulator and you can use Android Studio to debug or set breakpoints inside the Java files.
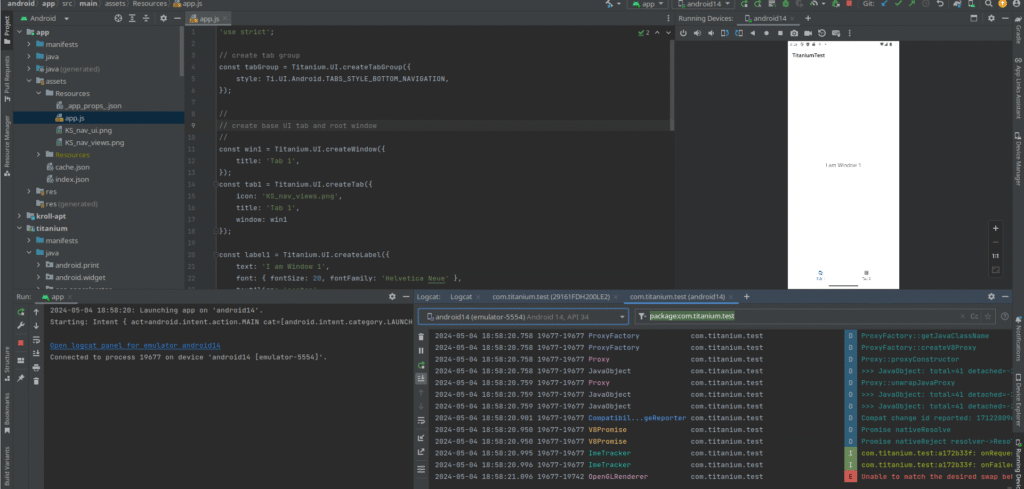
A quick way to find the files is the Ctrl + Shift + N short cut and search for the file. Just type app.js and you can quickly navigate to that file and edit it.
iOS
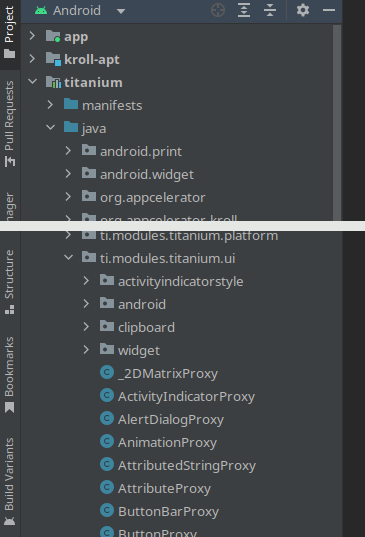
If you want to work on the iOS side of the SDK you can open the Titanium project file inside the iphone/iphone folder in XCode.
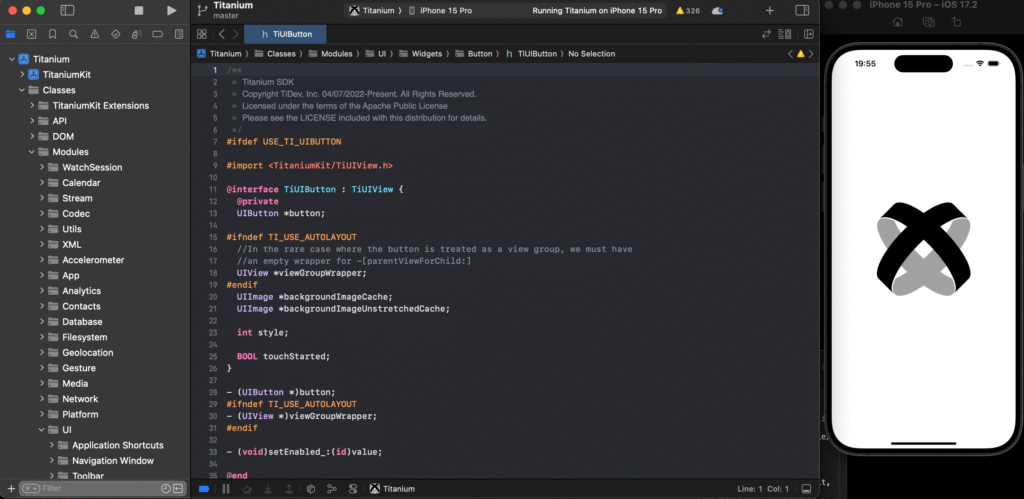
Inside Titanium/Classes you can find all the module and source files. If you want to debug from Xcode you can open the app.js file in iphone/Resources/ and press the play button in the top left section.
Fixing a bug
If you found a bug that you want to find and fix it is very helpful to create a classic Titanium app where you can reproduce the issue. That way you can add that code later into the pull request so the reviewer can test it and verify the issue and fix. As an example we use an issue that is in the current 12.2.1.GA SDK on Android where you won't get all the data inside a TabGroup selected event. The app code looks like this:
var win1 = Ti.UI.createWindow();
win1.add(Ti.UI.createLabel({text: 'I am a blue window.'}));

var win2 = Ti.UI.createWindow();
win2.add(Ti.UI.createLabel({text: 'I am a red window.'}));

var tab1 = Ti.UI.createTab({
    window: win1,
    title: 'Blue'
}),
tab2 = Ti.UI.createTab({
    window: win2,
    title: 'Red'
}),
tabGroup = Ti.UI.createTabGroup({
    tabs: [tab1, tab2]
});

tab1.addEventListener("selected", function(e){
  console.log(e.index, e.previousIndex)
})
tab2.addEventListener("selected", function(e){
  console.log(e.index, e.previousIndex)
})

tabGroup.open();
With that code ready we can start finding the issue in the SDK. Open the android folder in Android Studio and then we search for "selected" as that is the part where the error happens.
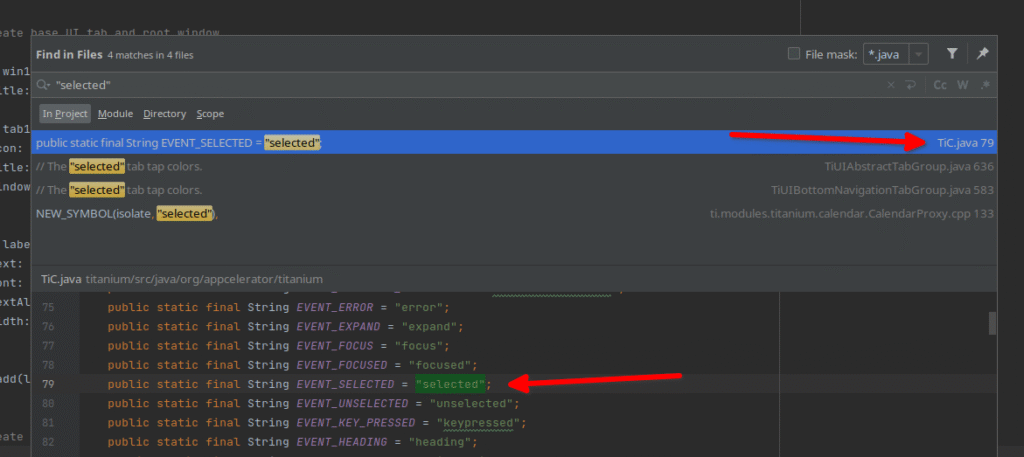
You'll find that string inside TiC.java which is a file that constants all global Titanium constants for events or properties. There constants are used all over the SDK so you don't rely on the strings but can utilize the constants. With that knowledge we can search for EVENT_SELECTED:
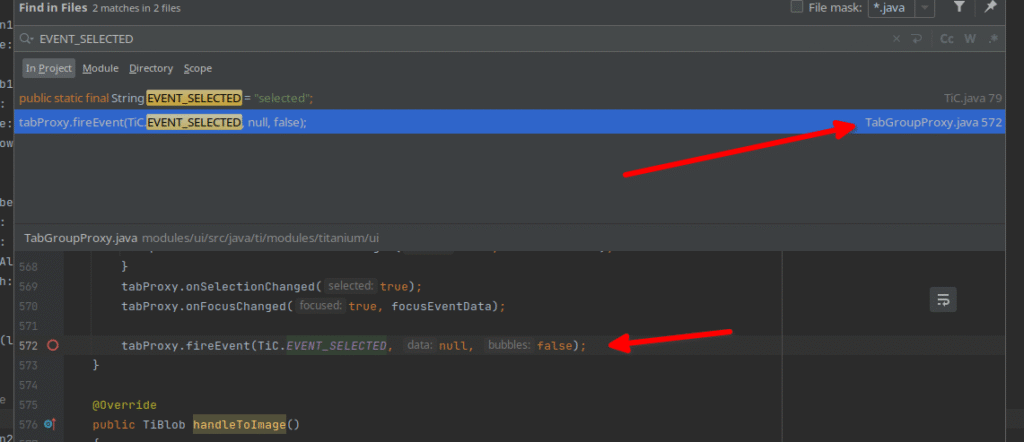
One hit in a file called TabGroupProxy.java and it is a fireEvent method that will transfer data from Java to Titanium. The method will trigger the addEventListener() in your app and the first parameter is the actual event name (selected in this case). This is the place we start our investigation what the issue might be.
You can set a break point in that line and start the debugger to see what the method is doing. But in this case we can also utilize some Android Studio features and hover the method to see some details:
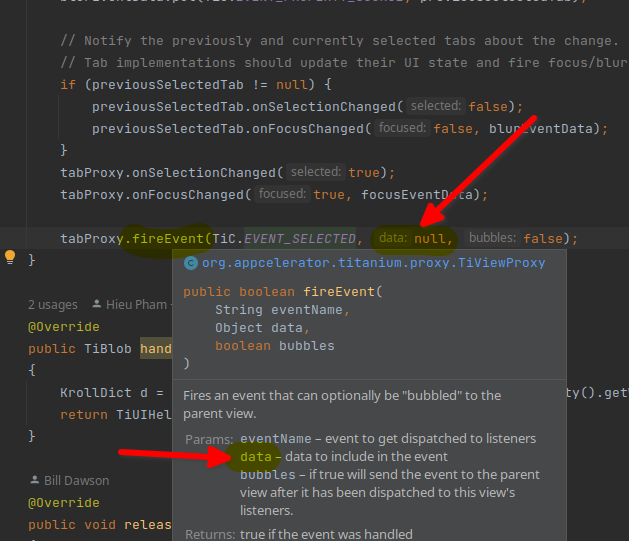
The second parameter data should contain the data that will be included in the event but in the Java code it is set to null. One line above you see a variable called focusEventData which contains all information like source or index. That is the data we want to push to Titanium. To do that we swap null with focuseEventData, build the SDK and run our test app again. Clicking the tabs and you can see the correct output in the console now.
Testing
The first thing you should test is your own code that you've prepared for the issue or your app where you had the issue. It might just be a small fix in this case but some changes might have side effects so it's crucial to test other apps too. Luckily the SDK includes a lot of test cases that help to check if you didn't break anything else. Simply run npm run test in the root folder and let the tests running.
Another app you should test is the Kitchensink app (https://github.com/tidev/kitchensink-v2) and the Hyperloop-examples app (https://github.com/tidev/hyperloop-examples). Build those two apps and click through them to see if everything is still working. After you've done that and everything runs fine you can create a pull request in the main SDK repository.
Create a pull request
In order to contribute to the Titanium SDK you have to go to https://tidev.io/contribute and fill out the contribution form. After that you are allowed to contribute code to the project. Your commit message has to follow a certain structure to be pushed to the repo, if it's not in the correct format you won't be able to push it. A valid name is e.g. fix(android): fix Ti.UI.Tab selected event to return data
The title should start with fix, feat, chore or docs followed by (platform): and the actual title of the fix. Add the changed files to a git commit and use that commit message and push the PR to your fork. After that you can go to the main Titanium SDK repo on GitHub and create a pull request. Make sure to include the test code in there so the reviewer can check the code and has something to test.
If you added a new property or changed something that needs an updated documentation you can look into the apidocs/ folder, find the correct file, make the changes in the YAML files and include that in the pull request.
Adding a new feature
In Titanium 12.2.1 it is not possible to change the background color inside the iOS RefreshControl widget. Create a small test project with this code:
const win = Ti.UI.createWindow();
let counter = 0;
function genData() {
    const data = [];
    for (let i = 1; i <= 3; i++) {
        data.push({ properties:{ title: `ROW ${counter + i}` } });
    }
    counter += 3;
    return data;
}
const section = Ti.UI.createListSection();
section.items = genData();
const control = Ti.UI.createRefreshControl({
    tintColor: 'red'
});
const listView = Ti.UI.createListView({
    sections: [section],
    refreshControl: control
});
control.addEventListener('refreshstart', () => {
    Ti.API.info('refreshstart');
    setTimeout(() => {
        Ti.API.debug('Timeout');
        section.appendItems(genData());
        control.endRefreshing();
    }, 2000);
});
win.add(listView);
win.open();
Since there is no backgroundColor in the RefreshControl yet we are going to implement that in XCode.
Open the Titanium project file from iphone/iphone in XCode and there you open iphone/Classes/TiUIRefreshControlProxy.m as we want to work with the RefreshControl. There is already a place that will change the tintColor so we can search for that and find (void)setTintColor:(id)value as a starting point for our PR. The method we want to use is called setBackgroundColor so we copy the whole setTintColor method and change to code to look like this:
- (void)setBackgroundColor:(id)value
{
[self replaceValue:value forKey:@"backgroundColor" notification:NO];
TiThreadPerformOnMainThread(
^{
[[self control] setBackgroundColor:[[TiUtils colorValue:value] color]];
},
NO);
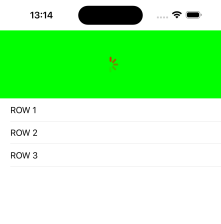
}Build the SDK and run your test code again. This time add backgroundColor: "green" to the createRefreshControl() method. If you pull down to refresh the list you will see a green background:
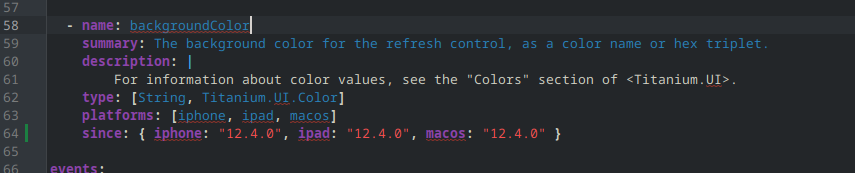
To finish the PR we need to add the new property to the apidocs/. Open apidoc/Titanium/UI/RefreshControl.yml and search for tintColor. Duplicate that section and adjust the parts so it will say backgroundColor and add the correct version number in the since part. It might look like this at the end:
Test your app, the test suite, KitchenSink and Hyperloop again, create a correct commit and push it to the repo!
What's next
Browse through the different folders inside the project and check the README.md files. These contain some more information about the project structure or the content of the folders. Open some UI files and just skim the code to understand how it works. You can even use the debugger and step through functions to see the flow inside the SDK. It will take some time to make your way around the SDK but it always helps to search for existing properties or methods, see how they work and duplicate them and adjust them to your needs.
Every contribution to the SDK helps to make it more stable and add new features so everyone can use them. It is an open source community project and contributions are more then welcome!